Infrastructure Projects
Infrastructure Projects is where you provision real cloud infrastructure using Terraform and Ansible. Compose your infrastructure from modular services — VPC, security groups, key pairs, EC2 instances and more — then execute directly against your cloud account and watch the live output stream in real time.
What are Infrastructure Projects?
An Infrastructure Project is a collection of configured cloud services that together define a complete environment. Each service maps to a Terraform module — for example a VPC module, a security group module, a key pair module, or an EC2 instance module. You compose these services inside a project, configure them to your requirements, and then execute the project against your cloud account to provision the actual infrastructure.
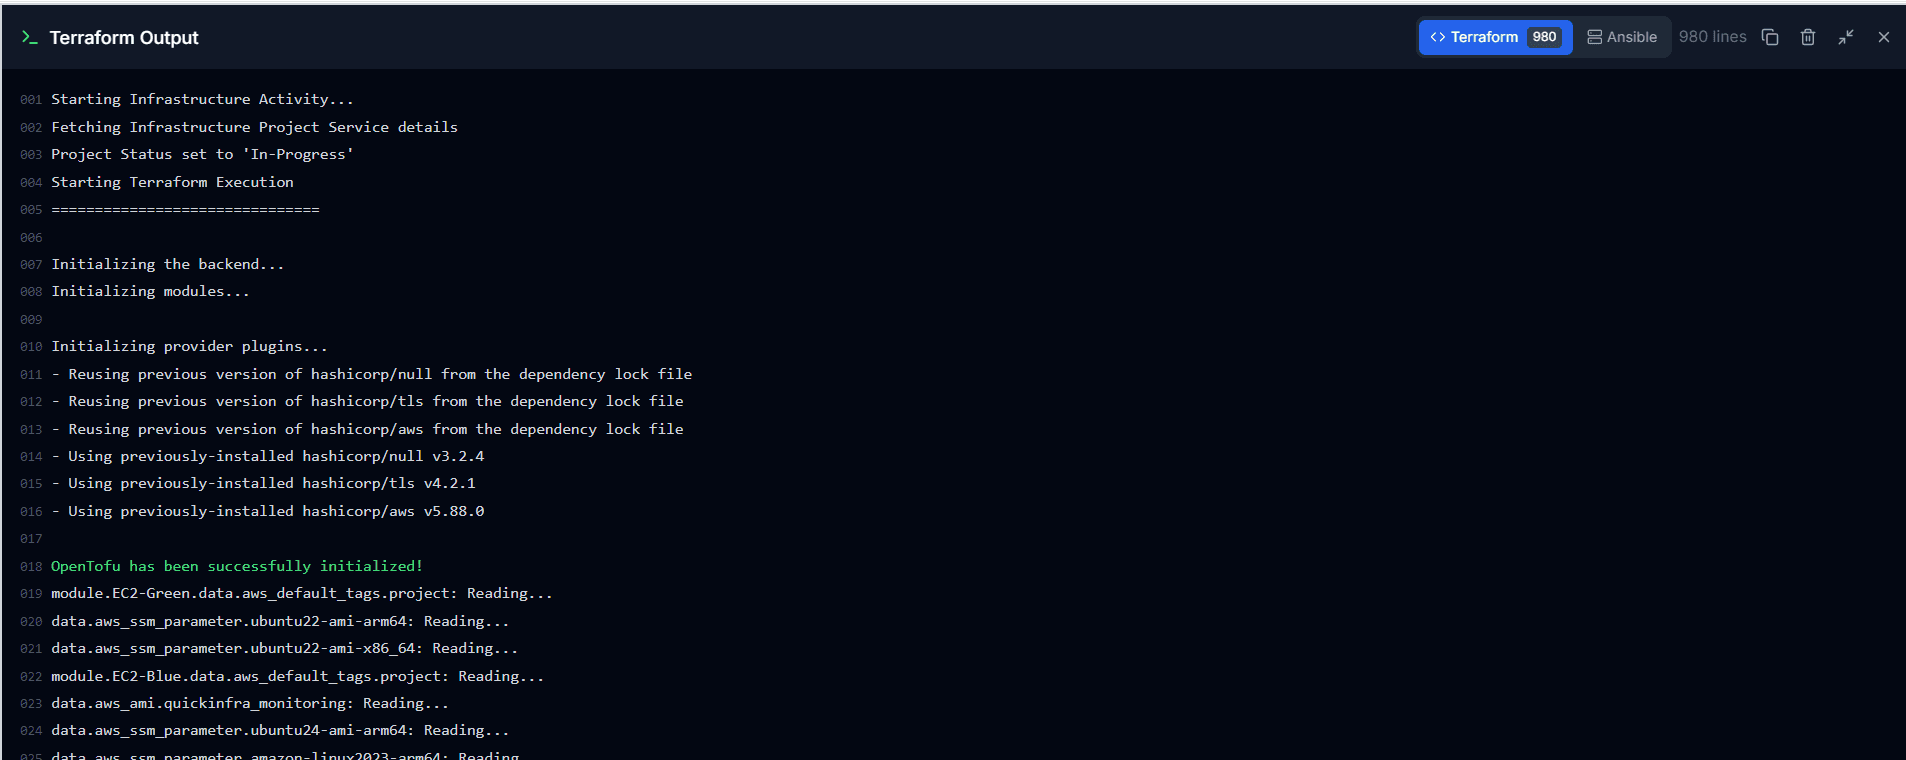
QuickInfra handles the Terraform execution engine underneath — you do not need Terraform installed locally or any CLI access. Select your cloud account, choose a Terraform action, hit Execute, and the output streams live to your terminal panel inside the platform. Ansible playbooks can also be layered on top for post-provisioning configuration management.
Three Ways to Create a Project
- From Scratch — Create a blank project, give it a name and region, then manually add and configure each service module. Best when you want full control over every parameter.
- Copy from an Existing Project — Clone any existing project — including production — as a starting point. All services and configurations are duplicated instantly. Change what you need and you have a ready-to-deploy replica. This is the fastest way to replicate production infrastructure into a staging or dev account.
- From a Ready-Made Template — QuickInfra provides a library of pre-configured infrastructure templates covering common patterns. Select one and a fully configured project with all services already set up is created for you — ready to execute with minimal changes.
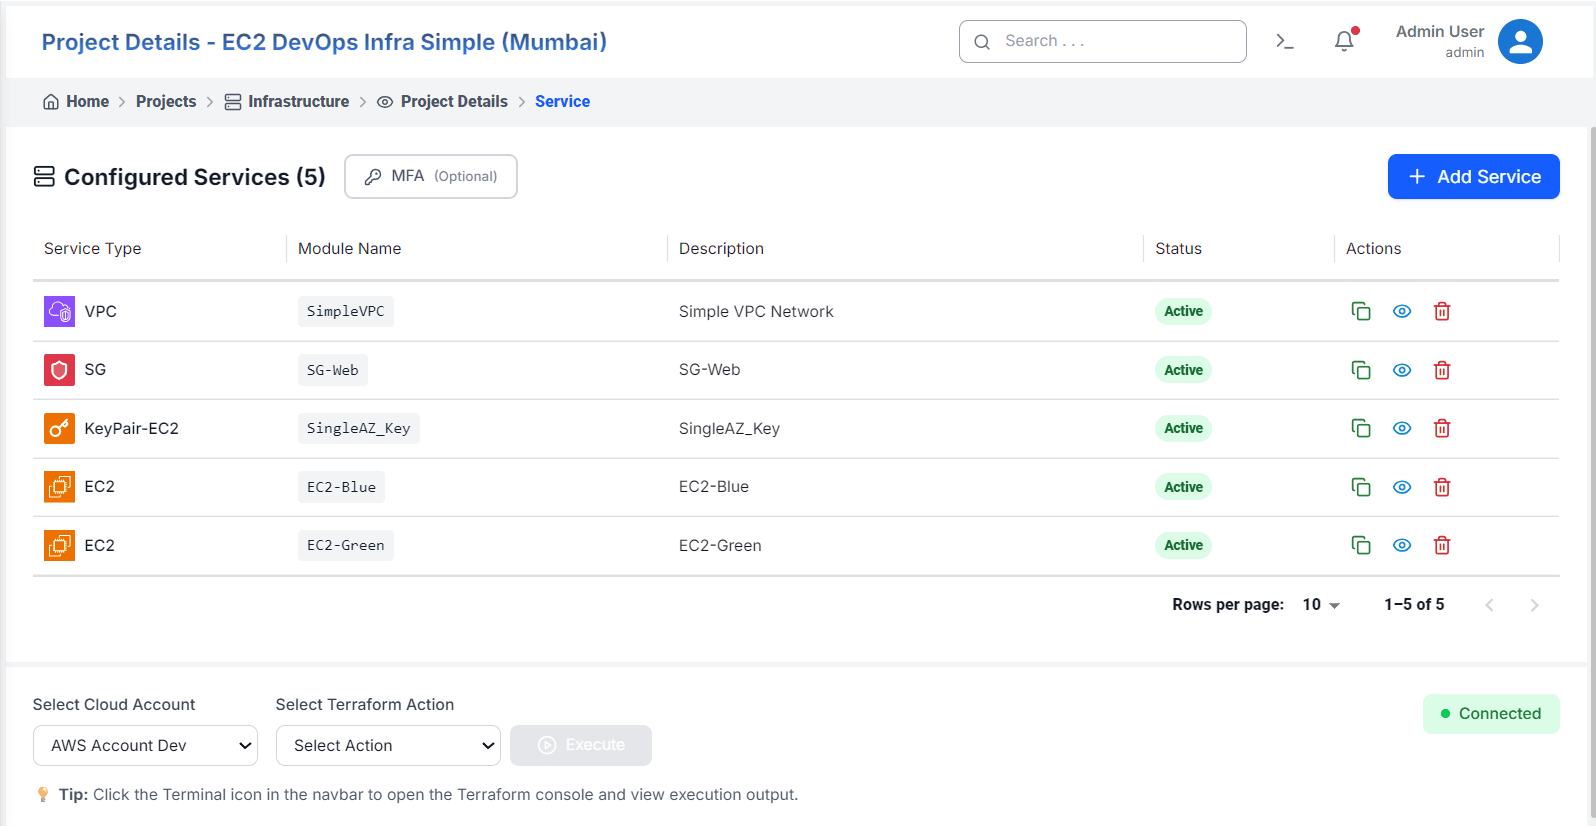
How to Set Up and Execute a Project
Terraform Actions
The Select Action dropdown gives you full control over what happens when you hit Execute. Each action maps to a specific Terraform operation run against your cloud account.
- Generate Terraform — Generates the Terraform configuration files for your project based on the services you have configured. No infrastructure is created yet — this just prepares the scripts and validates your configuration.
- View Terraform Plan — Shows a preview of what will be created, modified, or destroyed when you execute against your cloud account. Nothing changes in AWS — this is a safe read-only check and is recommended before every Apply in production.
- Create Infrastructure — Applies your Terraform configuration and provisions the actual cloud resources in your account. VPCs, EC2 instances, security groups, and all configured services get created.
- Plan and Create — Runs a plan first, then immediately applies it in one step. Recommended for most use cases — you get the safety of a plan with the convenience of a single action.
- Remove Infrastructure — Destroys all cloud resources associated with this project in your account. This permanently deletes VPCs, EC2 instances, security groups, and all other provisioned resources. Use with caution in production.
- Infrastructure Pricing — Estimates the monthly cost of your infrastructure before creating it. Sends your plan to the cost estimation engine and returns a breakdown per resource so you can review costs before committing.
- Infrastructure Diff — Compares your current state file against the actual state of resources in your cloud account. Useful for detecting drift — changes made directly in AWS outside of QuickInfra will be surfaced here.
- Update Modules — Refreshes the Terraform modules referenced in your project to their latest versions. Run this if a module has been updated and you want to pull in the latest changes before your next execution.
- Upgrade Terraform — Upgrades the OpenTofu providers to their latest compatible versions as defined in your configuration. Run this to stay current with AWS provider updates.
Service Actions
Each service in the project list has three action buttons available on the right:
- Clone — Duplicate the service configuration as a starting point for a similar module. Useful when you need two identical EC2 modules with minor differences, such as EC2-Blue and EC2-Green.
- View / Edit — Open the service configuration to review or modify its Terraform module parameters before the next execution.
- Delete — Remove the service from the project. This does not destroy the cloud resource — use Terraform Destroy for that.
Key Things to Know
- The Connected indicator at the bottom right confirms QuickInfra has a live connection to your cloud account and is ready to execute.
- Terraform state is managed by QuickInfra — you do not need to configure a remote backend or manage state files manually.
- The terminal panel is accessible at any time via the terminal icon in the navbar, allowing you to review execution output even after navigating away from the project.
- Ansible playbooks run after Terraform completes — they are used for post-provisioning configuration such as installing software, setting up users, and applying system hardening.
- Each project is scoped to a single region — create separate projects for infrastructure in different regions or accounts.